Virtual MCP
Verified Code examples on this page have been automatically tested and verified.
Federate multiple MCP servers into a unified virtual MCP backend
Federate tools of multiple MCP servers on the agentgateway by using MCP multiplexingMultiplexA connection method for MCP servers that allows multiple MCP sessions to share a single transport connection, improving efficiency..
About multiplexing
Multiplexing combines multiple MCP servers (targets) within a single backend into one unified MCP
server. All targets are exposed together so that clients can access tools from all targets
simultaneously. By default, when a backend has more than one target, tool names are prefixed with
the target name (e.g., time_get_current_time, everything_echo) to avoid collisions. You can
change this behavior with the prefixMode field, described in Tool name
prefixing.
Multiplexing is a property of putting several targets in one backend, not of the top-level mcp
section. You get the same result from routes[].backends[].mcp. To expose each MCP server on its
own path instead, give each one its own backend. For help choosing, and for how the choice affects
authentication, see MCP configuration modes.
Example multiplexing configuration
mcp:
  port: 3000
  # Multiple targets for multiplexing
  targets:
  - name: time
    stdio:
      cmd: uvx
      args: ["--with", "mcp<2", "mcp-server-time"]
  - name: everything
    stdio:
      cmd: npx
      args: ["@modelcontextprotocol/server-everything"]
Multiplexing vs. load balancing Although configured similarly, multiplexing is different than load balancing. Load balancing distributes requests across multiple backends. Each request goes to one backend, selected based on weight. You configure load balancing with multiple backends in a route (instead of multiple targets). For more information, see Backend routing.
Example load balancing configuration
routes:
  - backends:           # Multiple backends = load balancing
      - mcp:
          targets:
            - name: everything
              stdio:
                cmd: npx
                args: ["@modelcontextprotocol/server-everything"]
        weight: 1
      - mcp:
          targets:
            - name: everything
              stdio:
                cmd: npx
                args: ["@modelcontextprotocol/server-everything"]
        weight: 1
Before you begin
Configure the agentgateway
-
Download a multiplex configuration for your agentgateway.
curl -L https://agentgateway.dev/examples/mcp-multiplex/config.yaml -o config.yaml -
Review the configuration file.
cat config.yamlbinds:- port: 3000listeners:- routes:- backends:- mcp:targets:- name: timestdio:cmd: uvx# mcp-server-time requires `mcp>=1.23.0` with no upper bound, so uvx# resolves the SDK to 2.x, which renamed McpError to MCPError. The# server then fails to import and this target never starts, which# fails initialize for the whole multiplexed backend. Constrain the# SDK until mcp-server-time supports mcp 2.x.args: ["--with", "mcp<2", "mcp-server-time"]- name: everythingstdio:cmd: npxargs: ["@modelcontextprotocol/server-everything"]- Listener: An HTTP listener is configured and bound on port 3000. It includes a basic route that matches all traffic to an MCP backend.
- Backend: The MCP backend defines two targets:
timeandeverything. Note that the target names cannot include underscores (_). These targets are multiplexed together and exposed as a single unified MCP server to clients. All tools from both targets are available, prefixed with their target name.
-
Optional: To use the agentgateway UI playground later, add a
corspolicy to the route in yourconfig.yamlfile. The config automatically reloads when you save the file.# yaml-language-server: $schema=https://agentgateway.dev/schema/configgateways:default:port: 3000routes:- policies:cors:allowOrigins: ["*"]allowHeaders: ["*"]exposeHeaders: ["Mcp-Session-Id"]backends:- mcp:targets:... -
Run the agentgateway.
agentgateway -f config.yaml
Verify access to tools
-
Open the agentgateway UI to view your listener and target configuration.
-
From the navigation menu under MCP, click Tool Playground.
-
If you see a banner prompting you to allow browser access, click Apply CORS. This adds the UI’s origin to the MCP CORS policy so the playground can open a session, and the configuration reloads automatically.
-
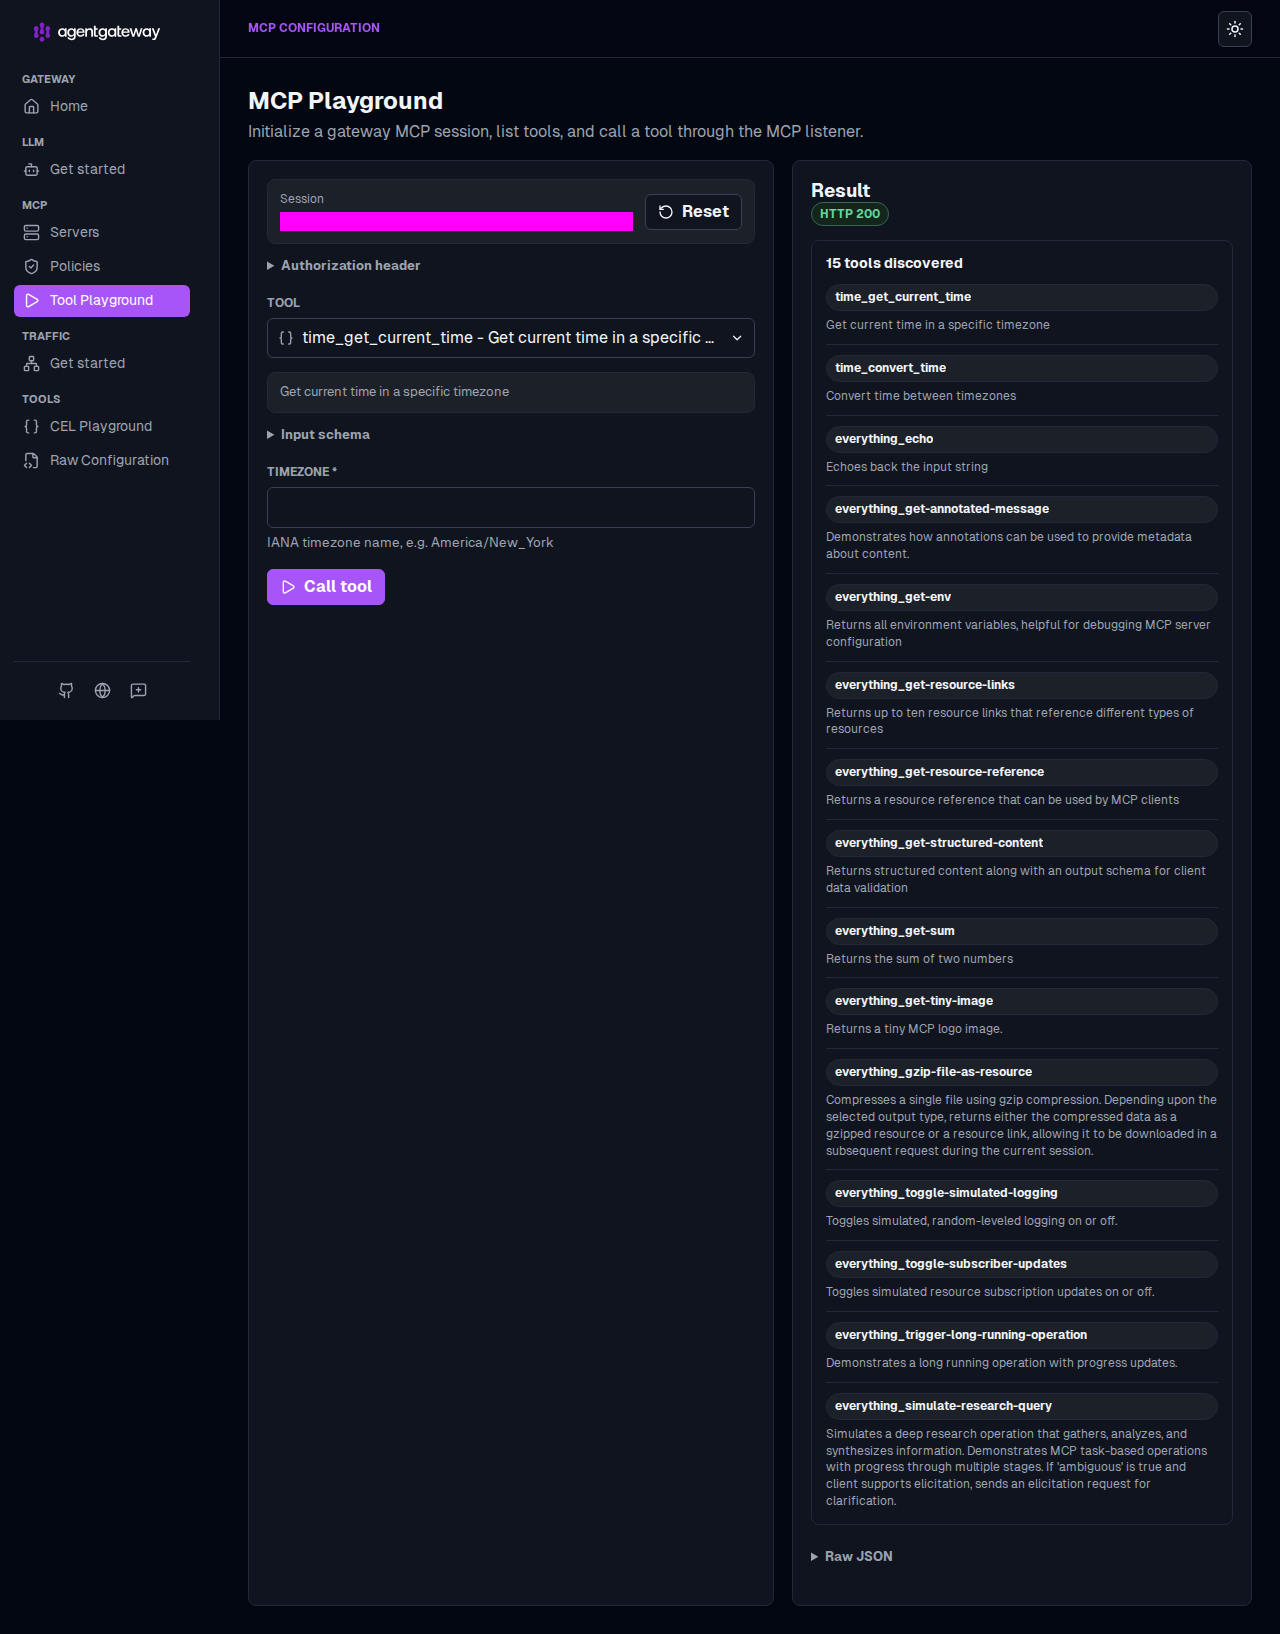
Click Initialize. The agentgateway UI opens an MCP session and lists the tools that are exposed across all targets in the backend.
-
Verify that the Result panel reports the discovered tools and that each tool name is prefixed with its target name, such as
everything_echoandtime_get_current_time. You now have a federated view of the tools from every target in the backend.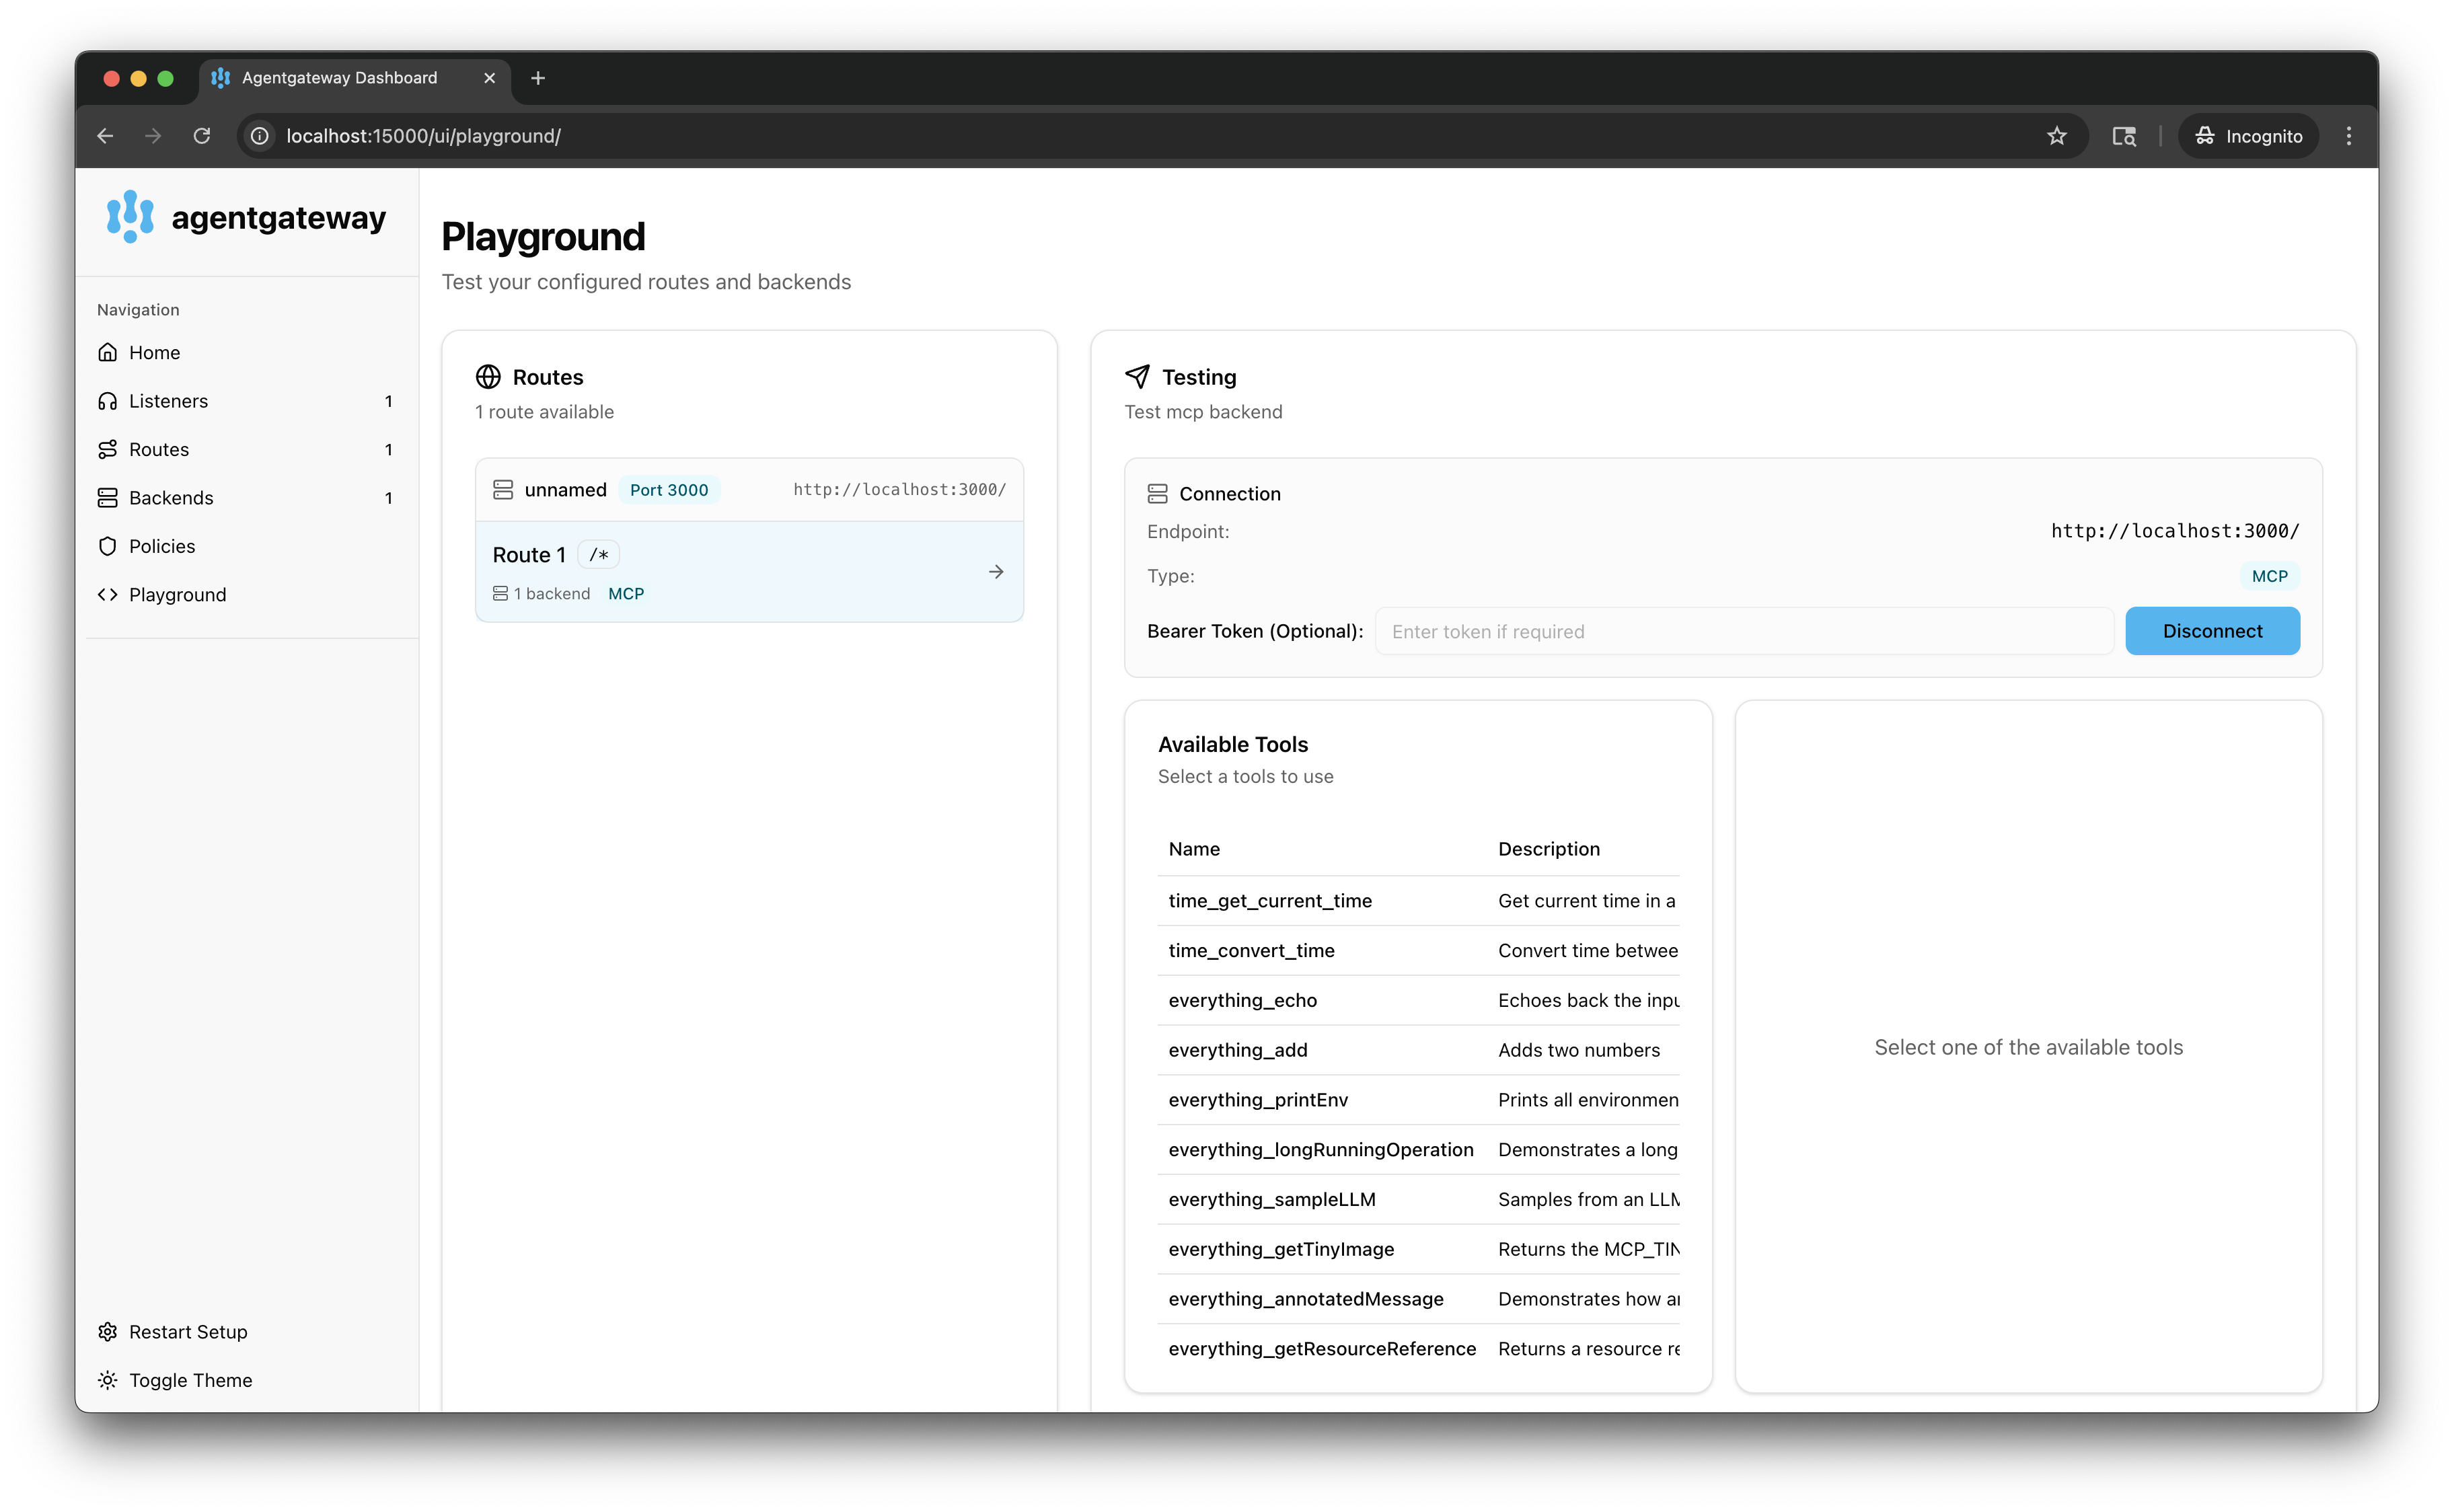
-
Verify access to a tool from the
everythingtarget.-
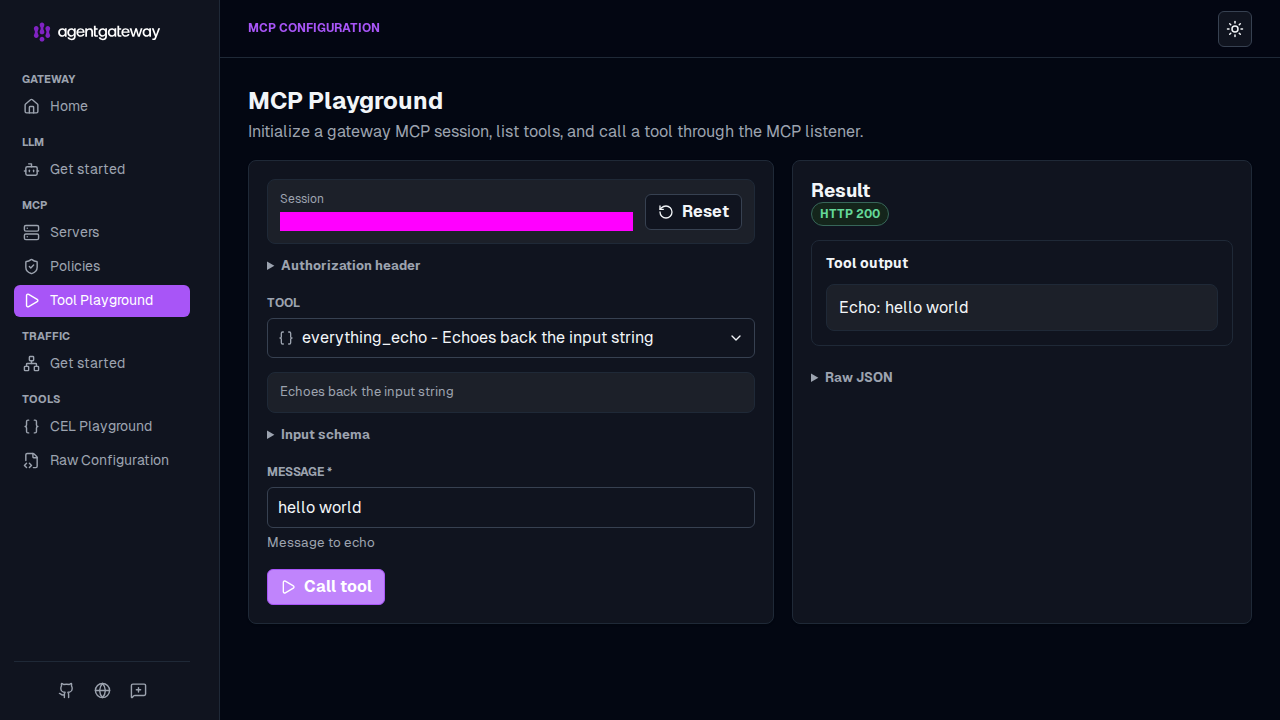
From the Tool dropdown, select the
everything_echotool. -
In the Message field, enter any string, such as
hello world, and click Call tool. -
Verify that the Result panel returns
HTTP 200and that your message is echoed in the Tool output.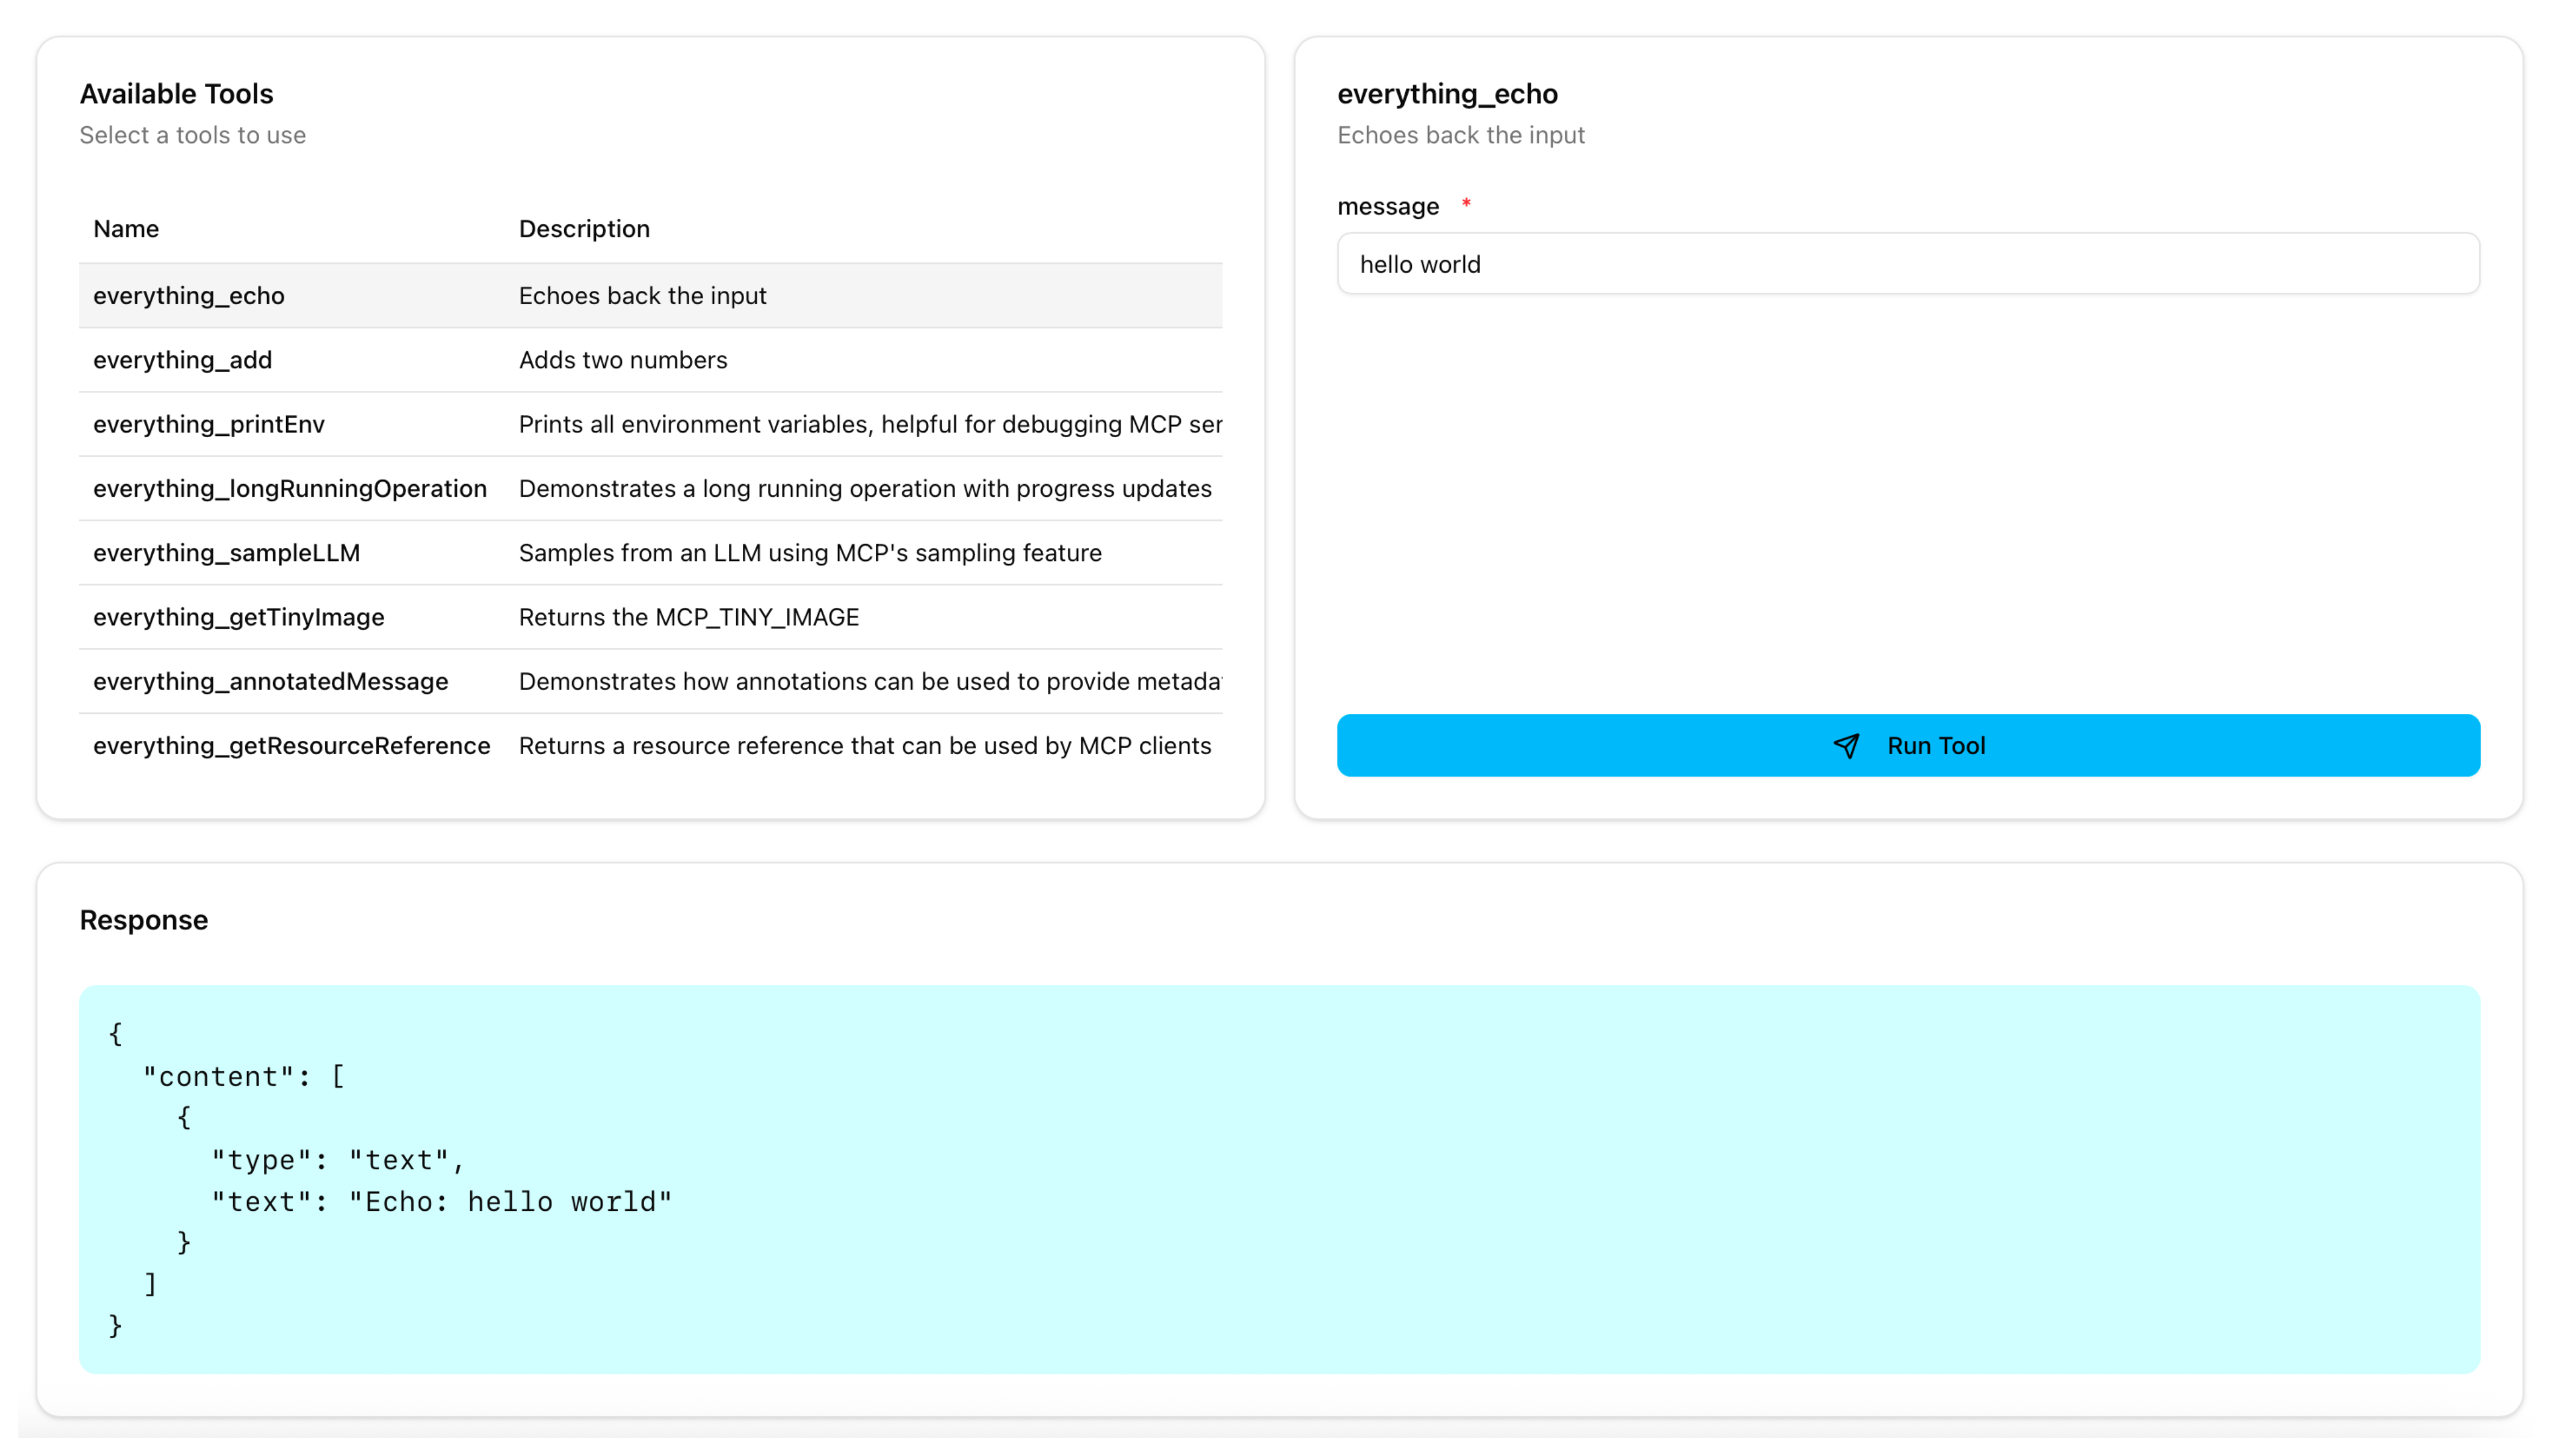
-
-
Verify access to a tool from the
timetarget.-
From the Tool dropdown, select the
time_get_current_timetool. -
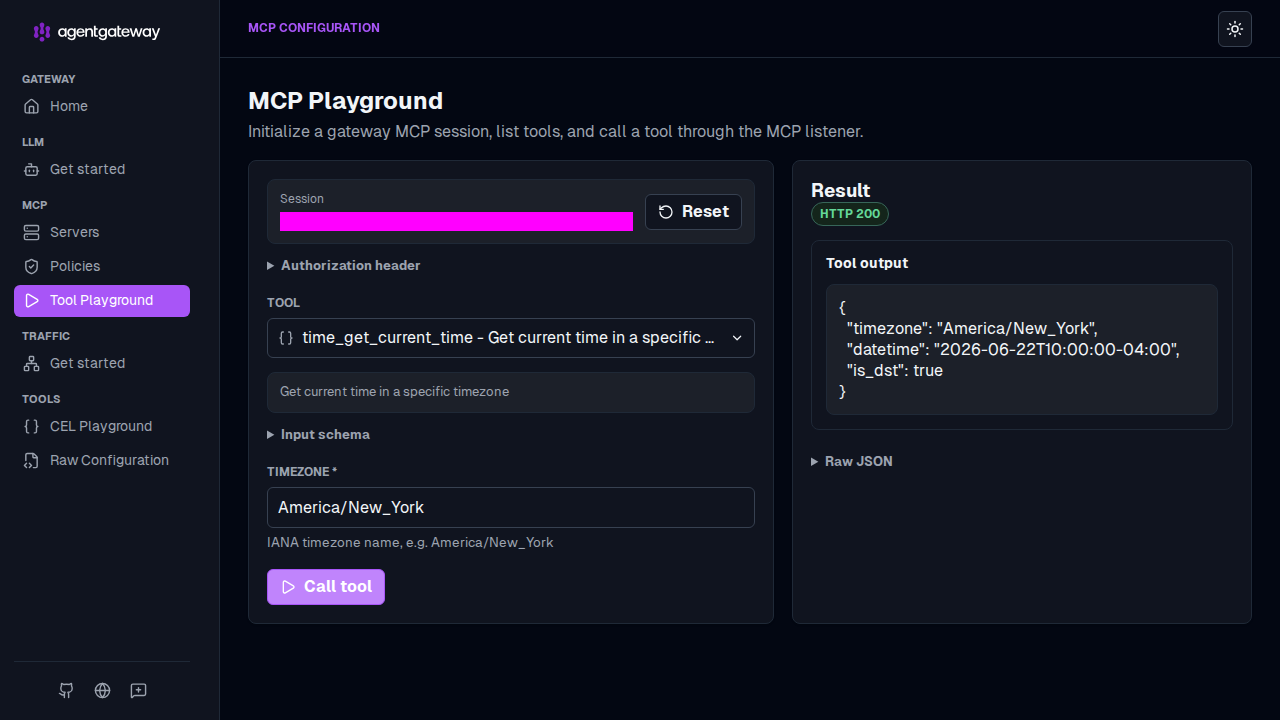
In the timezone field, enter a timezone, such as
America/New_York, and click Call tool. -
Verify that the Result panel returns
HTTP 200with the current time in the Tool output.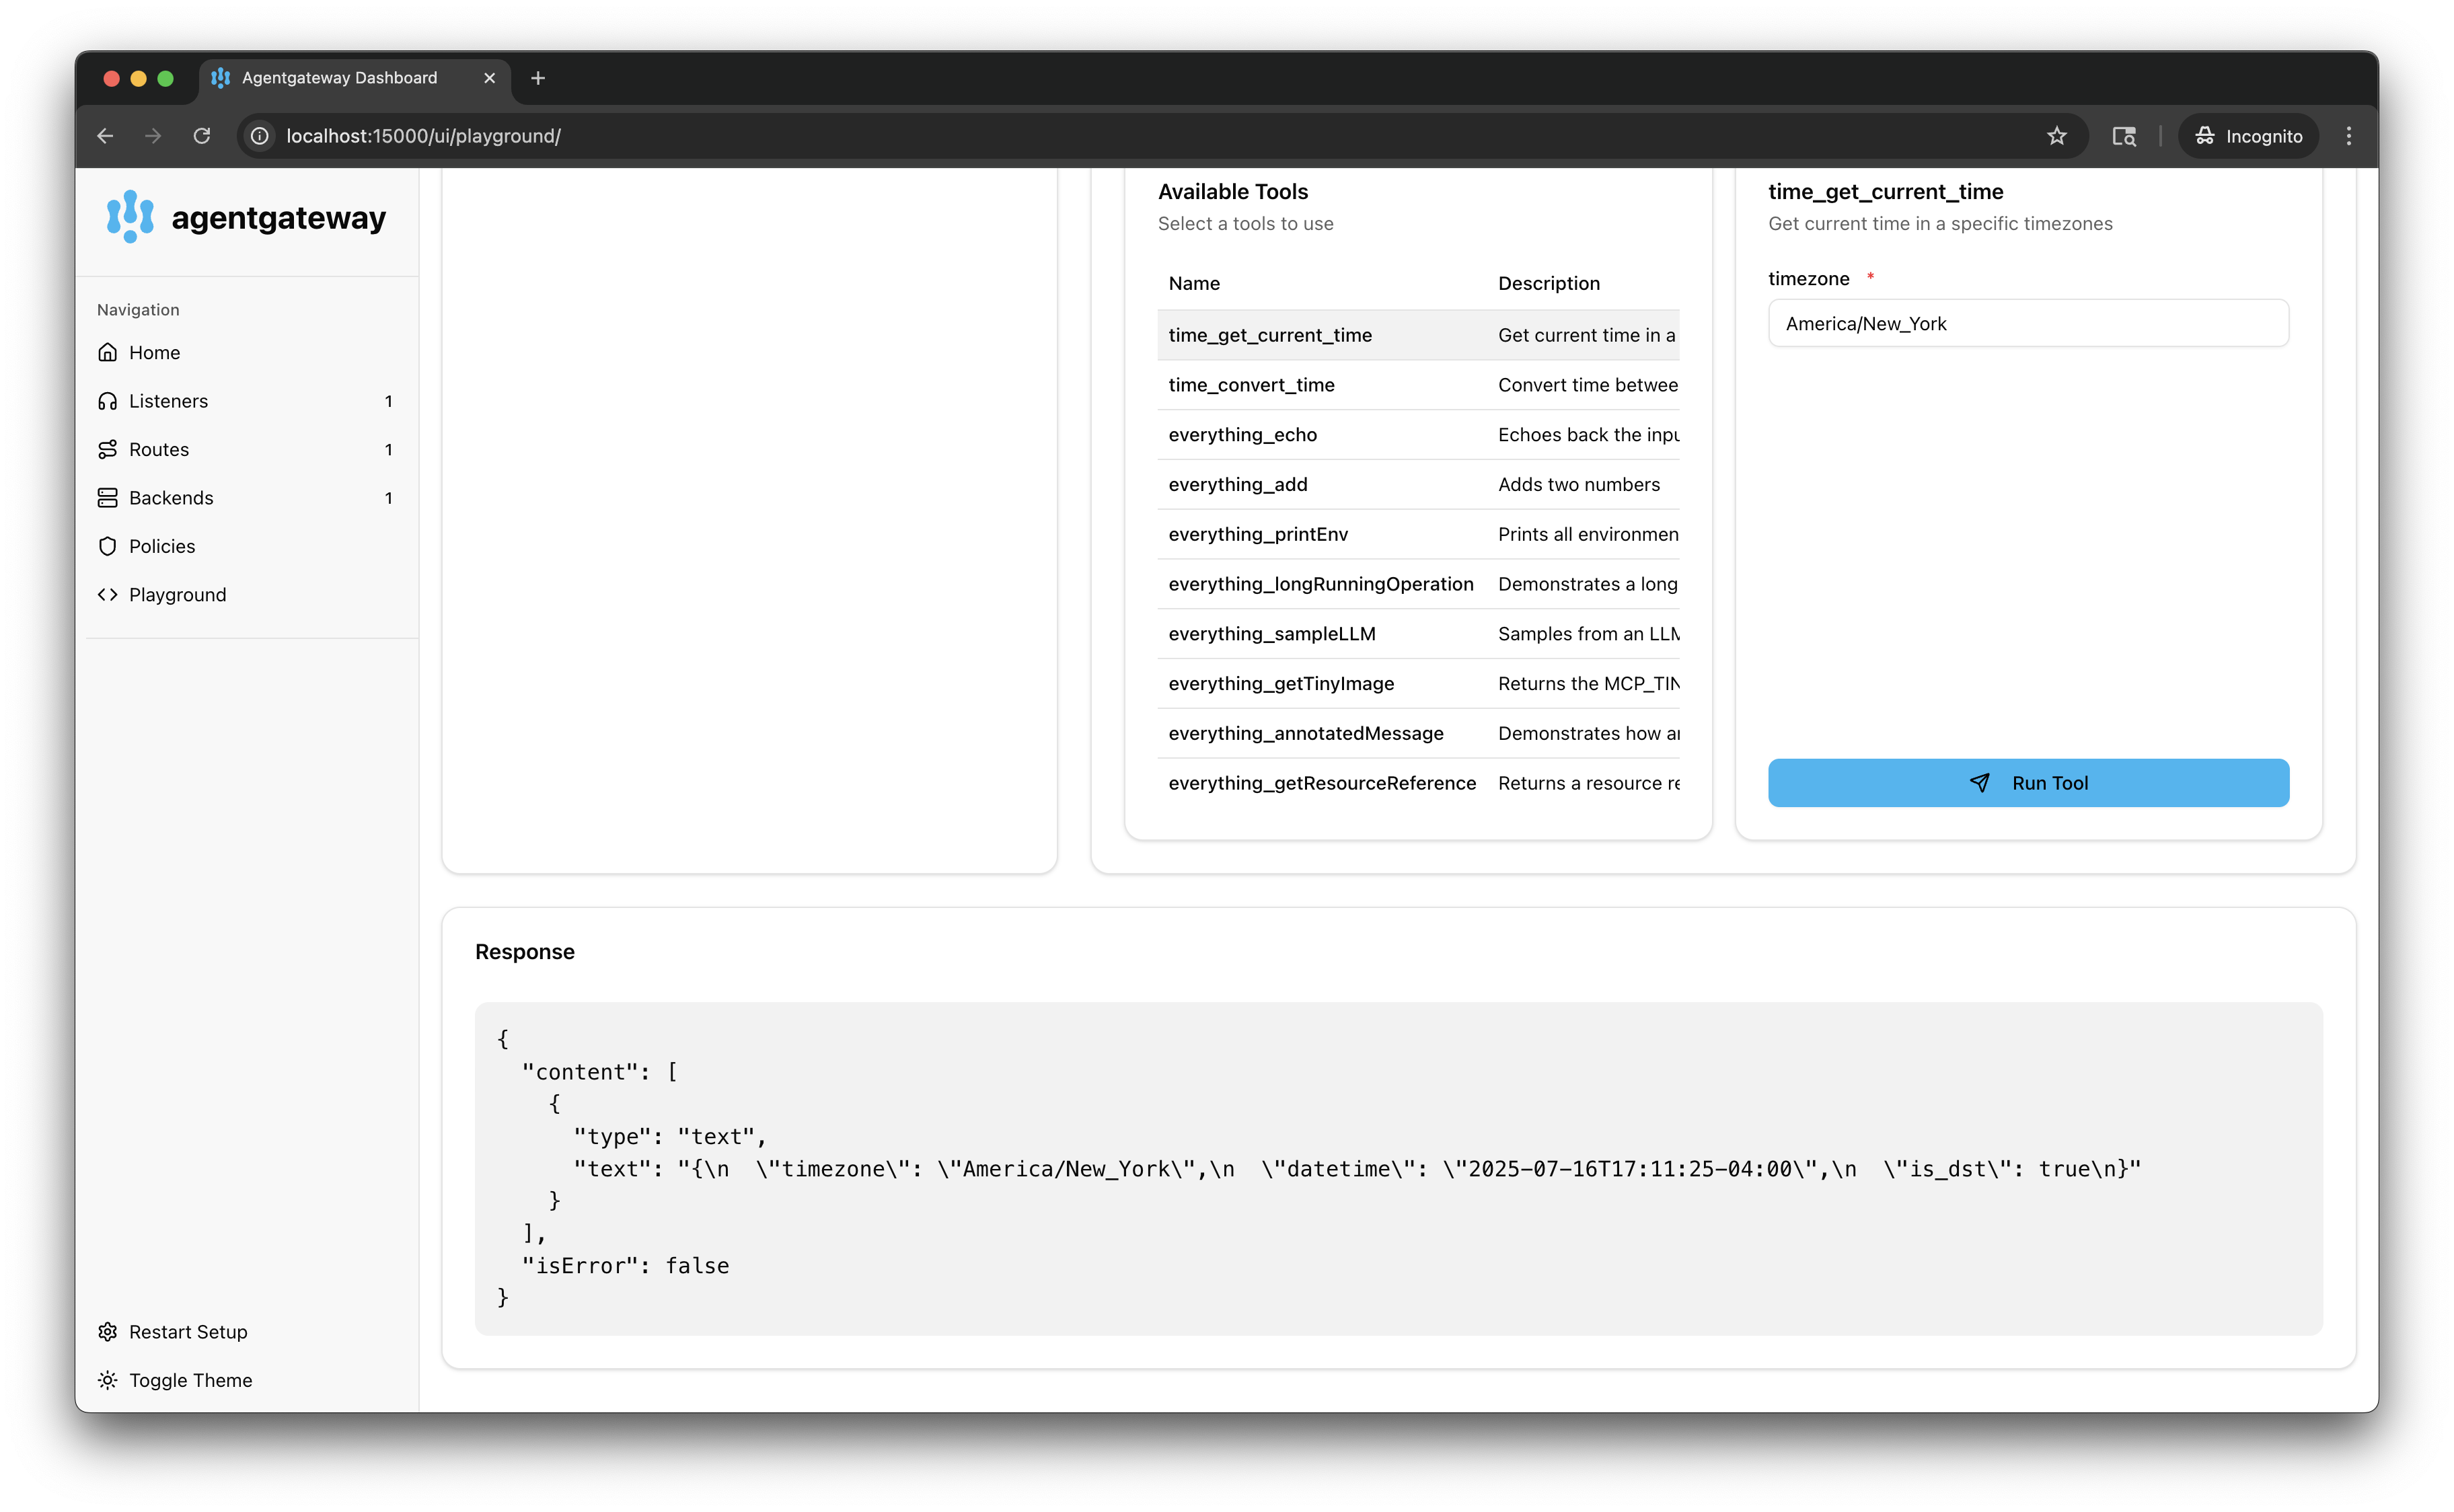
-
Tool name prefixing
When you multiplex multiple targets, agentgateway namespaces tool and prompt names with the target
name so that identical names from different servers do not collide. Resource URIs retain target
routing information and are unaffected. Control this behavior with the prefixMode field on the MCP
configuration.
prefixMode | Behavior |
|---|---|
conditional (default) | Prefix tool and prompt names only when the backend has more than one target. |
always | Always prefix names, even when the backend has a single target. |
never | Never prefix names. Calls are routed by looking up which target serves the name, so names must be unique across all targets. |
Use never when clients need to call tools by their plain names, such as for MCP
Apps that issue tool calls from a rendered UI. Because unprefixed
names must be unique, agentgateway fails to start if two targets expose the same tool name in this
mode.
# yaml-language-server: $schema=https://agentgateway.dev/schema/config
mcp:
  port: 3000
  prefixMode: never
  targets:
  - name: time
    stdio:
      cmd: uvx
      args: ["--with", "mcp<2", "mcp-server-time"]
  - name: everything
    stdio:
      cmd: npx
      args: ["@modelcontextprotocol/server-everything"]
The time target pins the MCP Python SDK with --with mcp<2 because mcp-server-time does not yet support version 2.x of the SDK. Without the constraint, the target fails to start. Drop the constraint after mcp-server-time adds support.
Next steps
- Apply different policies to different MCP targets with MCP target policies.